Tuesday 30 July 2013

Themed Portraits - She IS the Law!!

The latest instalment to my Themed portrait gallery is actually one of the first I drew!
Commissioned early, I had to wait until this one had been received as a birthday present before showing all of you.

But now, she's tough. She's foxy. She's the Law, ya na!

A big happy birthday to Judge Whittle!!


Remember you too can have yourself or a friend drawn as a favourite literary, historical or sports character, your imagination is the limit!
Just take a look at the steps and examples below then get in touch!
sara-dunkerton@hotmail.com


Tuesday 23 July 2013

Themed Portraits - A Couple of Commissions!

Morning all!

It's been exactly a week since I announced that I'm open for commission with these themed portraits, and I'm humbled by the number of people who shared, re-tweeted, re-blogged and basically helped me plaster every social network with that link!
So a big thank you, and I hope that the word continues to spread!

Right now though I'm happy to share with you a couple of commissions I received in lieu of that announcement!

First a special request from a pair of magical mischief makers Lizzie and Lucie. They are massive Harry Potter fans and asked to be wearing Hogwarts robes to celebrate their graduation.
Well done guys! Best of luck to the both of you for the future!!

It's not that easy being Green, but I think Ellie is pulling it off! This second portrait was another special request to be portrayed as a Deathwok demon, like Lorne from the TV series Angel, complete with jazzy shirt, microphone and martini!


If these have wet your appetite and you'd like a themed portrait of your own, or you know someone who would, then all you need to do is follow the simple steps below!


Tuesday 16 July 2013

Themed Portraits - Opening for Commission TODAY!

Hi everyone!
Back around Halloween last year I did a trial run of Zombie Portrait Commissions, these proved quite popular so I have spent the last few months developing a broader range of themed portraits!

And I can happily say that today I am OPEN FOR COMMISSION!

So if you ever fancied seeing yourself as your favourite historic, sports or literary character, or you're looking for the perfect personalised gift for a friend then take a look at what I have for you:


Step 1: Choose Your Theme!

Listed below are a very broad range of general and literary themes to inspire you! Simply pick one straight from the list or suggest ideas to make it more personal.

I am totally open to suggestion!

Horror - Zombies
    - Vampires
    - Werewolves
    - Frankenstein

Fantasy - Fairies/Pixies
     - Mermaids/Mermen
     - Trolls/Gremlins
     - Winged people

Sci-fi - Robots/Androids
  - Aliens
  - Astronauts/Spacemen

Sports - Football
   - Motor Racing
   - Tennis
   - Cricket

Historical - Roman Centurian/Gladiator
 - Medevil Knights/Arthurian Legend
 - Wild West Cowboys/Indians
 - Pirates
 - Victoriana
 - WWII

Fairy Tale - Red Riding Hood
 - Snow White
 - Cinderella
 - Rapunzel  
 - Jack and the Beanstalk

Wonderland
 - Alice                       - Mad Hatter
 - March Hare            - Dormouse
 - White Rabbit          - Cheshire Cat
 - Queen of Hearts     - Playing Card Henchman
 - Tweedle Dum and Tweedle Dee 

Sherlock Holmes
 - Sherlock
 - Watson
 - Moriarty

Oz
 - Dorothy                            - Cowardly Lion
 - Scarecrow                         - Tin Man
 - Good Witch of the North  - Flying Monkey
 - Wicked Witch of the West

Neverland
 - Peter Pan           - Wendy
 - Tinkerbell          - Lost Boys
 - Captain Hook    - Smee
 - Tiger Lily

The Three Musketeers
 - D’Artagnon               - Athos
 - Porthos                      - Aramis
 - Cardinal Richelieu    - Milady de Winter 
  
Shakespeare
 - Macbeth  
 - Romeo and Juliet
 - A Midsummer Night’s Dream 


Step 2: Choose Your Portrait Type!


Is it a portrait for one? Are you doubling up with a friend? Or are we going for a group shot?
Take a look at the Full Body and Head & Shoulder portrait types that I offer and see what’s best for you!

Head & Shoulders Portraits


Single Head & Shoulders - £10
A5 portrait with approx 11cm x 11cm drawing area.


Double Head & Shoulders - £12
A5 landscape with approx 11cm x 14cm drawing area.


Triple Head & Shoulders - £14
A5 landscape with approx 11cm x 17cm drawing area.


Full Body Portraits


Single Full Body - £14
A4 sized with approx 21cm x 18cm drawing area.


Double Full Body - £17
A4 sized with approx 21cm x 11cm drawing area.


Triple Full Body - £20
A4 sized with approx 21cm x 14cm drawing area.

Plus £1.50 P&P on all commissions for UK postal orders!
Specs and prices for groups larger than three will be determined by commission requirements

Step 3: Get In Touch!

Once you’ve chosen a theme and a portrait type let me know about your idea and I’ll make it happen! Contact me via email:
sara-dunkerton@hotmail.com


Please include in your request photos of the people that are to be drawn (the larger the variety of pics the better) and any specific reference for your chosen theme, and I can get started!
I can accept online payments via Paypal to the email address stated above.

***


Still undecided? Let's have a look at a few examples of what the final portraits look like!

Single Head & Shoulders: "En garde!" Alex chose to be drawn as a Musketeer!

Single Head and Shoulders: SPBM's Lovely Lee donned in WWII bomber gear, in the style of Oddball from Kelly's Heroes!

Single Head & Shoulders: The Good, The Bad and... Josh!? Western Cowboy theme drawn in the style of Clint Eastwood.

Single Full Body: My petrol head Dad went for the sporting theme with his motorbike and Ford Focus team overalls.

Single Full Body: Taking a more theatrical turn now with Ian as Shakespeare's Macbeth!

Double Full Body: Gem and I fly high! My sister and I opted for a more fantasy portrait, she is sporting Cardinal wings and I have those of a Kestrel! This is also a nice example of the versatility of these commissions!


So there you have it, your imagination really is the limit with these portraits! So if you fancy one then please get in touch!


Saturday 13 July 2013

Magic of Myths: Byron the Plush Bear - pt 2


Morning all!
Yesterday you all saw Byron's progress from concept sketches, to mis-shapen blue jellybean to an almost complete plush!
Today I shall take you through the final stages of making Byron!

Okay so here is how we left him. (If you missed pt1, click here!)


The next stage was to armour him!
Before I cut up any material I referred to the initial drawn template and cut out and pinned on paper mock ups. These I could then use as patterns for the armour.


Once happy with size, shape and positions of the paper mock ups I could begin sewing!
I chose a shiny navy blue PVC fabric to make his armour as I felt that would create a nice contrast against his soft felted body. However I didn't anticipate the trouble such a fabric would cause! I attempted using a sewing machine at the beginning, however I found that the fabric just simply wouldn't machine smoothly and I had to abandon that idea to hand sewing the armour instead. Making the armour was definitely the most challenging part of this process!

I experimented with several methods in constructing the armour, I aimed to create raised ridges on some pieces and quilted panels on others. I eventually cracked the method for creating these effects, and I'll show you how using Byron's back plate as an example.

I started off with a paper shape cut out of regular printer paper and glued on rolls of kitchen roll to create the raised ridge, very Art Attack!

Then I placed a small amount of the same polyester fibre I used for Byron's core in the centre of the raised ridge. This was then sandwiched between two layers of the PVC fabric with glue sealing the outer edges and the underside, but NOT in the centre where the fibre is.


Next I sewed around the outside of the armour shape, and then sewed on the inside edge of the raised ridge made with the kitchen roll. Then I sewed four lines along the width of the space inside the raised ridge, where the polyester fibre was placed. This created the desired quilted effect I wanted to distinguish separate plates.


Lastly the shape was cut out and highlights and details were painted on using silver acrylic! I also used a dark marker pen around the cut edges as they showed the white of the fabric's underside.


And there you have it! A complete set of armour for Byron the Bear!

Attaching the armour onto Byron was quite a brutal process, I secured the pieces it to his body with pins and in some places a dab of glue. Then I began the difficult process of sewing through 4 layers of fabric and paper, through his felted body deep enough to secure it in place then back out 4 layers of fabric and paper! Byron started to exact his revenge to this sergery by the end, breaking one very thick needle and making my fingers very very sore!

Very nearly there now, the only things remaining were to make his claws and red tattoo on his shoulder. these I did last as I thought them potentially too fragile to survive while sewing on his armour. 

The tattoo shape was done in a similar way to Totoro's belly markings, using very slender strands of red wool and carefully felting them onto his shoulder to the right shape. And the claws were all made separately out of small equal sized balls of white wool and then felted onto his paws one by one, adding any extra bits of blue wool to neaten up the joins. 

And there he is; armoured, clawed and ready for battle!


Byron the Bear will be making his debut alongside Magic of Myths: season 2 at San Diego Comic-Con this month!!

If 'ol Byron here has perked your interest in Magic of Myths you can find out more about the comic, the creators and events on the website: http://magicofmyths.com
The first book is available to buy on that same website, along with pre-order for season 2! Go check it out!!

Friday 12 July 2013

Magic of Myths: Byron the Plush Bear - pt 1


He's big, he's blue and he's mean as all hell... but oh so CUTE!!!
I give you my needle felted recreation of Byron the Bear from Corey Brotherson's Magic of Myths!


It all started a while ago when I made a needle felted Totoro plush. It just so happened that at that time Corey was looking for someone to make a soft toy replica of his character to promote the release of the second book in the Magic of Myths series! The professionals turned Corey away saying the character was too complicated, but I opted for the challenge to bring this homicidal demon bear to fuzzy life!

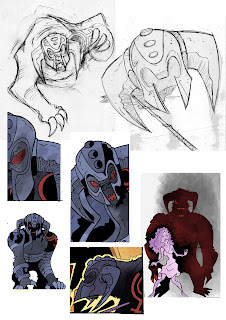
But first I had to know what this guy looked like! Corey instantly provided me with some of Sergio Calvet's (illustrator of Magic of Myths) amazing character studies: 


Armed with these gorgeous illustrations I was able to get started!
If you've been following my previous felting projects then you should know the process by now so I'll just give a brief rundown of how this guy was made. 

Firstly from Sergio's character sketches I drew up this template to act as a size guide. you can see that the legs are drawn in blue, the armour in green and his claws, tail and ears in red. this was to help me differentiate all the separate parts that would need to be built up and added to Byron's main body shape.


Next up I made up Byron's main body shape out of Polyester fibre to act as a core fibre to then build the colour wool upon. Here you can see the right and top views of the core fibre then the fully covered main body shape... not much to look at yet.


Here is where we add his legs. Using the template I made these separately and carefully made sure they were all the right size and shape by lining them against each other and pinning them onto the main body shape.


Once happy with each of his legs it was time to attach them and make that mis-shapen blue jelly bean look a bit more bear-like! I did this one pair at a time, blending the edges of the legs where they join the body to make a smoother, more realistic shape. 


To complete his body all that's left is to make his head...


... and finally add on the details - ears, nose, eye (cause he only has one) and tail! 


The eye is just a small  orange/red bead thats simply glued in place, then the eyebrow was kinda sculpted around it. The nose and the missing eye are filled in using small amounts of black felting wool, and the ears and tail were made separately then attached.


And there you have it! The meanest of the blue meanies, Byron the bear! Isn't he cute!Next time I'll show you how I made the armour and finishing touches for this sucker! In the mean time check out the Magic of Myths site, here you can buy season one (which I highly recommend!) and pre-order the second, due for release on the 26th July!